Are you ready to try your hand at making or modding CC? Download Sims 4 Studio to get started!
The idea of making your own custom content might seem overwhelming, especially with how elaborate and game-changing some of the bigger mods out there are. You might feel like a tiny fish in a pond full of bigger, better, prettier fish and like it’s not worth even trying. Don’t feel discouraged, though! It’s actually not that hard to get into making your own CC, and while there’s a steep learning curve for more elaborate mod content there are still plenty of creators out there who have made incredible CC with just basic tools like an image editor and Sims 4 Studio.
All About Sims 4 Studio
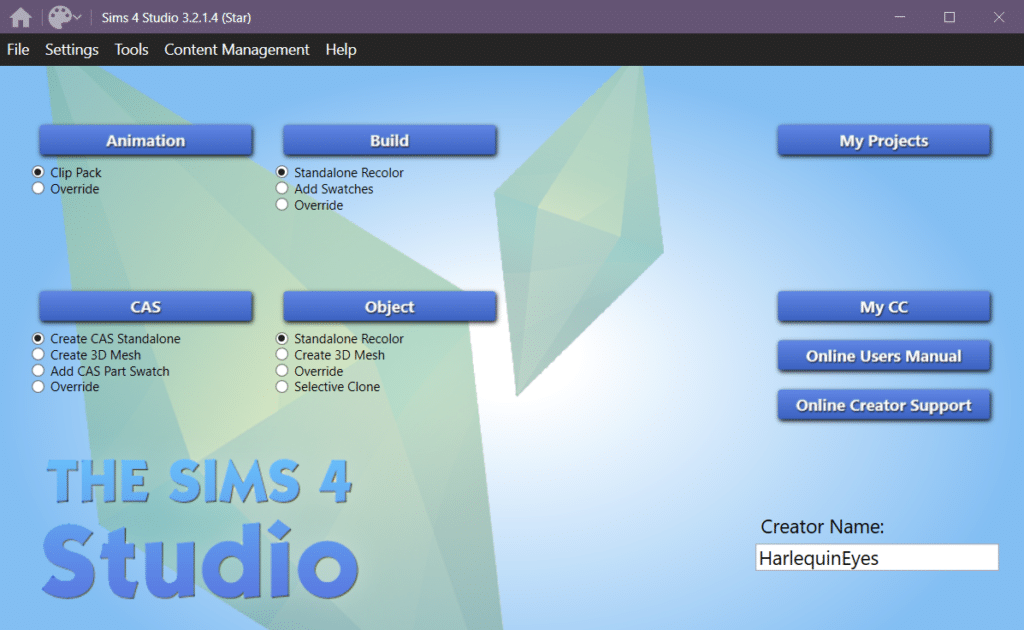
Sims 4 Studio—or S4S—is a program created for simmers by simmers to help facilitate bringing CC into The Sims 4. While the program itself is pretty robust with lots of different things it can do, when it comes to making custom content S4S serves in a mostly helping capacity. Don’t worry, we’ll explain.
If you take a look at the image above you can see on the left that S4S breaks things down into 4 main categories: Animation, Build, CAS, and Object. Depending on what category you’re working in you will use Sims 4 Studio as an importer alongside other program(s) where you’ll do most of the work.
So for example, if you’re making a recolor you’ll be changing the texture and making new swatches with an image editing program like GIMP, Canva, Photoshop, etc. which you then import into S4S where it will apply the texture to the object mesh. If you’re making a new piece of furniture you will first create/convert the model and texture in a program like Blender and then import the object into S4S to bring it into the game. Sims 4 Studio serves as kind of a liaison between The Sims 4 and whatever utilities you use to create your CC items.
Getting Started Once You Download Sims 4 Studio

Head to the website and scroll to “Downloading & Installing Sims 4 Studio” where you’ll find detailed directions on how to download Sims 4 Studio, which version you should use, and how to get it running. As you can see in the image above there are other threads you can check out once you’re more familiar with S4S, such as the beta testing area where you can be kept up to date with changes in the program.
Creating Simple CC With S4S
The Sims 4 Studio website is full of useful tutorials so we’re not going to go too deeply into it here, but let’s make a simple recolor to get you comfortable. This process will be the same for CAS and Build/Buy content except for tags, which we’ll touch on later. We’re going to make a piece of artwork, and I’ll even make it available for download if you want it!
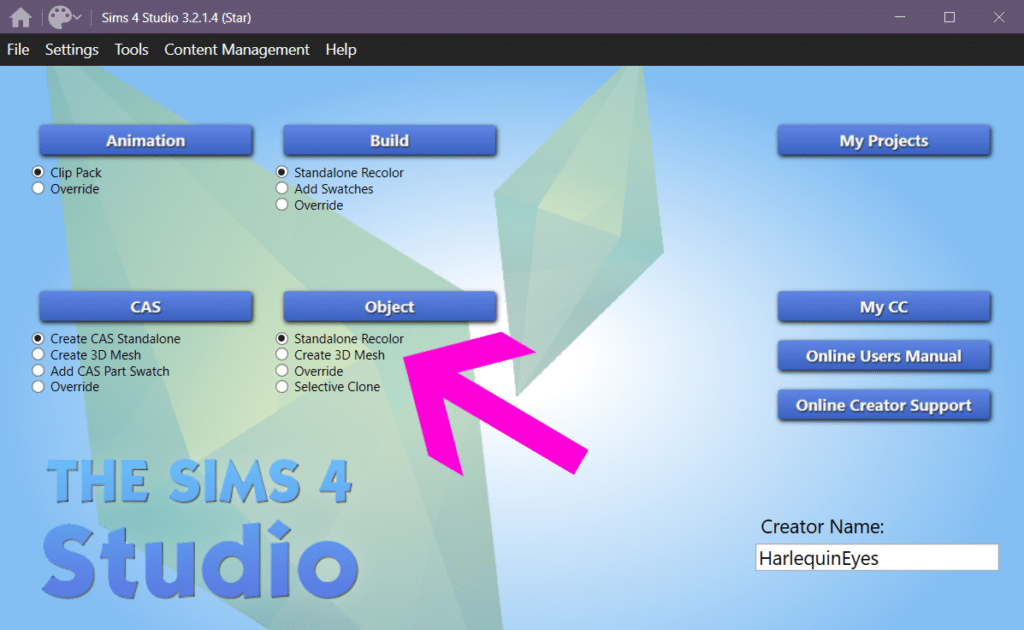
An item like a piece of artwork would count as a “Standalone Recolor” under the Object button and since that’s already the option that’s selected, click the Object button to continue.
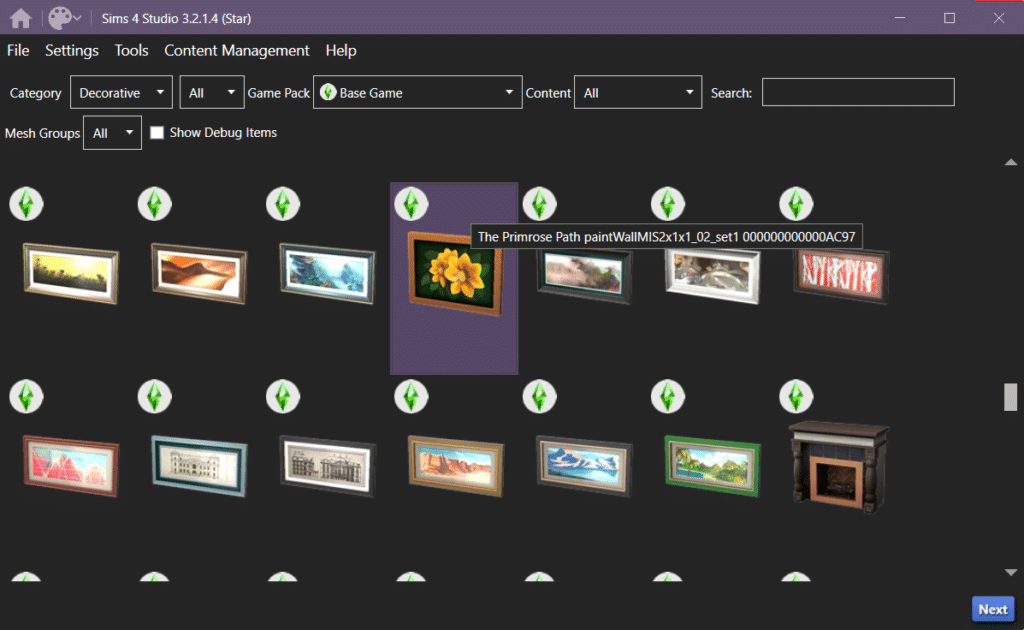
S4S will then load up all the objects from all The Sims 4 packs you have. You can use the drop-down menus and Search box to find the item you want to recolor (in this case we want a Base Game mesh so everybody can use it). Once you find the object, hit “Next” and then give your project a name to save it under, and save it to a location that’s easy to find.
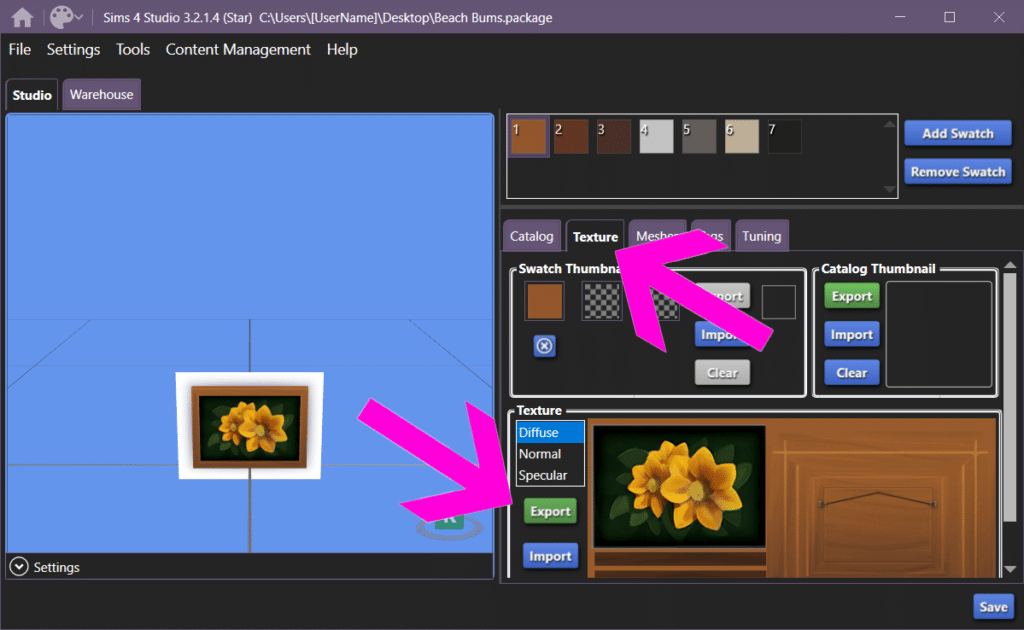
The next screen will show the object you selected and a bunch of different options. Go to the “Texture” tab and select the “Diffuse” texture, which is the main part of the item’s color data. Hit “Export” and save it under a name and in a location you can find easily.

Now, open the Texture file in your image editor of choice. Looking at the texture for this specific item you can see that it’s designed to wrap around the mesh from front to back; textures and placements will vary from item to item. It’s at this point that you make the item yours! Edit and change the texture however you want whether that means simply adjusting the color, changing a pattern, or completely modifying the design.

For this project, I took a screenshot from the game, added some text, and tweaked the color of the picture frame a little bit. Once you’ve changed the texture to your liking and have saved it, go back into S4S and this time instead of clicking “Export” we’re going to select “Import” and choose your updated texture.
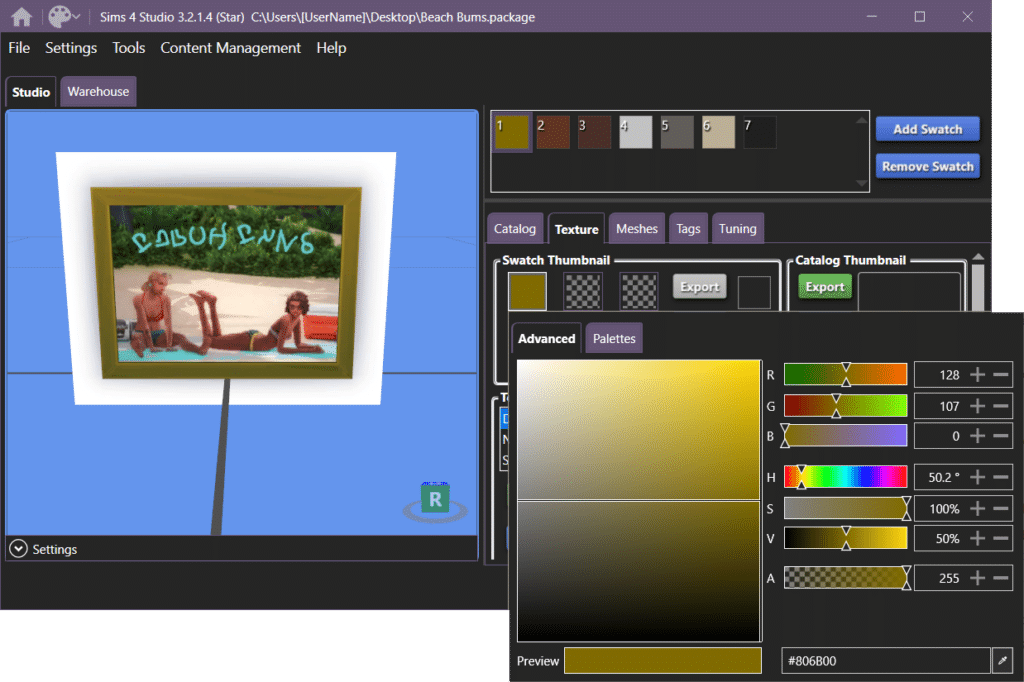
Check out that texture! The swatch color looks off now, so I clicked the Swatch Thumbnail and chose a color that better matches the frame. I’m also going to to select every other swatch shown at the upper right of the screen and remove them, so the object doesn’t have additional swatches. You don’t have to do this step if the object only has one color or if you’re planning on updating other swatches too. S4S allows you to have as few or as many swatches as you’d like.

Once you’re happy with how the item looks, you can go to the “Catalog” section and change things like the description, price, and style, and if you click the “Tags” tab you can change things like what category it shows up in for the Buy catalog and what color the game should consider it (Tags are also available for CAS items but will be completely different from Object Tags). When you’re done with all changes, hit Save.
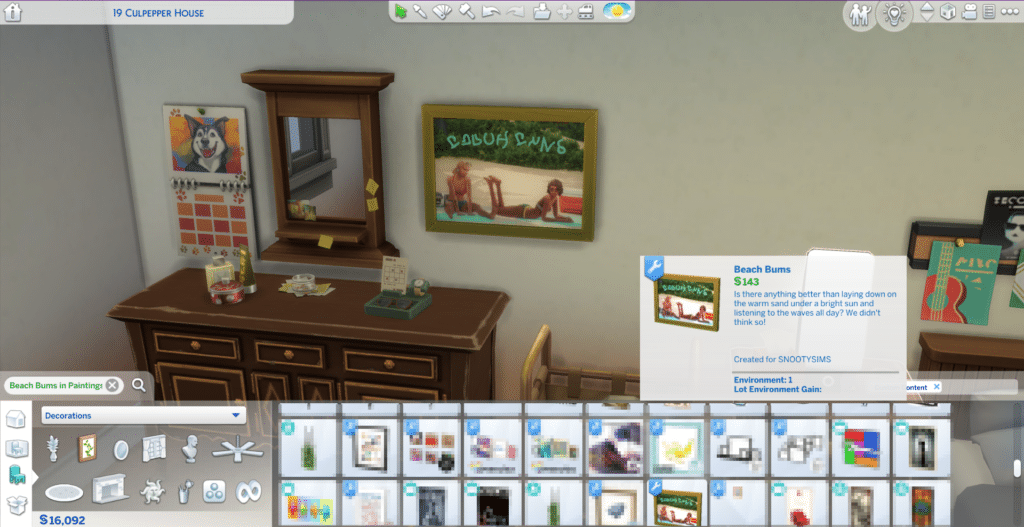
Find where you originally saved the project and move the .package file to your mods folder. If everything was done correctly you should be able to find it in the game, and can even search the catalog for it by name!
More on SNOOTYSIMS: Learn how to use Sims 4 Studio to organize your CC and take more control over the game catalog.
Tips
Here are a few tips to help you make your first recolor:
- You can edit and re-import item Textures over and over again so you’re able to make small adjustments and then see them in real-time on the mesh. It’s a great way to play with recolor ideas and check for things like stretching on the mesh or funky graphic placement.
- Nothing is final until you Save. If you accidentally delete a swatch or make changes in the catalog data that you don’t like, just back out without saving the project.
- Make sure you actually put the project’s .package file into your Mods folder to test it! It sounds silly but I can’t tell you how many times I’ve forgotten to do it and then wondered why my recolor wasn’t showing up in-game.
In Conclusion
There are so many possibilities for what you can do when you download Sims 4 Studio, and it’s not just for recolors either! Take a look at the related content below for more examples of the things you can do with S4S, because it’s a useful program even if you’re not interested in making CC.
If custom content is your goal though, making simple recolors when you download Sims 4 Studio is the perfect place to start. Add your favorite tee shirt to the game, give a piece of furniture a new color that goes with your sims’ decor, or make a bunch of posters for your young sims to hang in their rooms. Your only limit is your imagination, and once you get comfortable with the basics there are tutorials out there to bring you to the next level. Go as far with it as you want, have fun, and happy simming!
PS – You can download the Beach Bums recolor we made today here!


Your Author: Hi! I'm Nicole
SnootySims @ Patreon
Discuss with the SnootySims-Community:
What are your thoughts on this post? We'd absolutely love to hear your opinion! Feel free to drop a comment and share your thoughts. If you happen to spot a broken link or notice any outdated mods or custom content, please give us a heads up. We're a small team of Sims enthusiasts doing our best, and sometimes, we might miss a little hiccup. Your feedback means the world to us, and we appreciate your support immensely. Thank you a bunch! 🌈🎮